Everything that goes into a warm roof lantern
01The basics
What a roof lantern is, and the rooms it suits
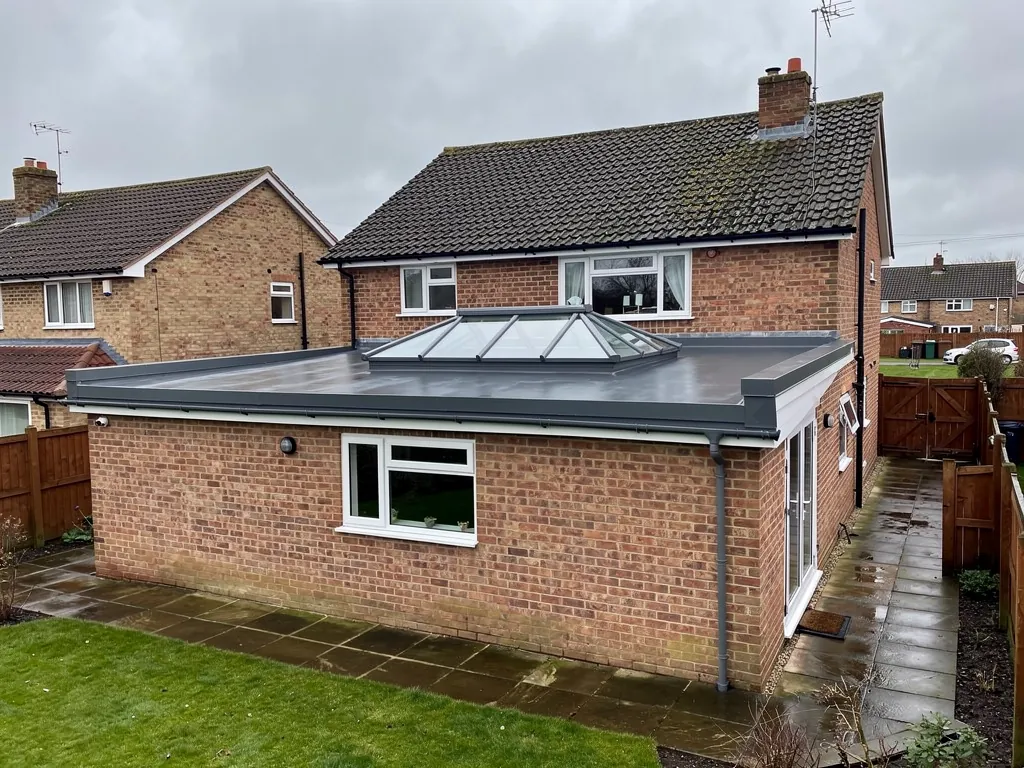
A roof lantern is a raised glass roof that sits on a flat roof and pulls daylight down into the room from every side. It suits deep, single-storey rooms that are dark in the middle.
Picture a small glass pyramid, or a long glass ridge with sloping sides, sitting on top of a flat roof. That is a roof lantern. The frame is made of glazing bars that run from a central ridge down to a perimeter, and each panel between the bars is a sealed glass unit. Underneath, the lantern stands on a raised timber kerb (the trade calls it an upstand), and the ceiling below is opened up and lined so the glass reads as part of the room rather than a hole cut in it.
Because the glass faces several directions at once, a lantern collects daylight from the whole of the open roof above it, not just from one side. That is why it does more for a deep room than a window in the back wall ever can. A flat rooflight, which is a single glass panel laid almost level, does a similar job in a smaller, cheaper and lower-profile way. A lantern adds height. The ceiling seems to lift, and the room gains a focal point you will want to stand under.
Where lanterns earn their place in south Essex
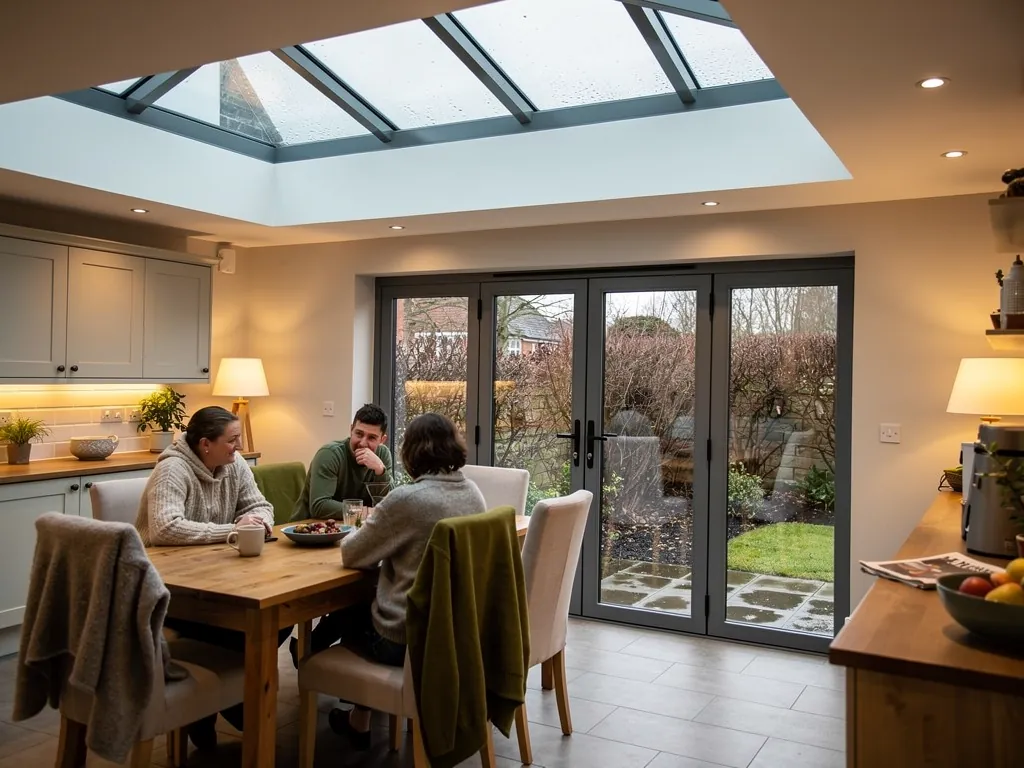
The classic home for a roof lantern is the single-storey rear extension. Across Basildon, Billericay, Wickford and the towns around them, plenty of new-town semis and post-war terraces were extended at the back in the sixties, seventies and eighties. The extension made the house bigger, but it also pushed the old back windows further from the garden, and the middle of the ground floor went dim. A lantern over the new kitchen-diner puts that light back.
Garden rooms are the other big one. A garden room with a lantern feels like an orangery without the full glass walls, and it keeps most of the wall space for units, a sofa or a log burner. We also fit roof lanterns over open-plan living spaces, over a dining table in a knocked-through room, and over the flat-roofed section of a chalet bungalow where the middle of the house never sees the sun.
A lantern is not the answer for every flat roof. A narrow hallway, a small utility or a shower room is better served by a flat rooflight or a sun tunnel, and our flat roof rooflights page covers that route, and every type we install is on our services page. The lantern is for the room where people gather and stay a while.
02Sizing
Sizing a lantern to the room, not to the brochure
The right lantern is the one that fits the room's proportions, sits where the room is used, and leaves enough roof around it to insulate properly. Bigger is not automatically better.
It is tempting to order the largest lantern the roof will take. Resist it. Every square metre of glass lets in more light, and it also lets out more heat than the insulated roof it replaces. A lantern that dominates the ceiling can make a room glare in July and feel chilly in February. The aim is a lantern big enough to light the room evenly and no bigger.
We start with the room, not the roof. Where do you sit? Where is the island, the dining table, the sofa? The lantern should sit over the part of the room that most needs daylight, which is usually the area furthest from the existing windows and doors. Then we look at proportion. A long, narrow kitchen suits a long rectangular lantern. A squarer garden room suits a square or near-square one. A lantern that follows the shape of the room looks planned. One that fights it looks like an afterthought.
The roof decides the limits
The joists set the practical limit. A lantern sits on a structural opening, and the joists that are cut to make that opening have to be carried by new timbers (trimmers) at each side. On a new extension the architect or engineer designs the opening in from the start. On an existing roof we check which way the joists run, how deep they are and what they sit on, because that decides how wide the opening can sensibly go without heavier steel or timber work.
We also leave a margin of insulated roof between the lantern and the walls. That border keeps the room from feeling like a glass box, gives the plasterer a clean edge to work to and keeps the warm roof build-up continuous around the opening. Our guide to roof lantern sizes and proportions walks through the shapes and standard sizes in more depth.
- Where in the room you spend the most daylight hours, and which end gets the least light now
- The run and depth of the joists, and whether the opening needs new trimmers or a steel
- The shape of the room, so a long room gets a long lantern and a square room a square one
- An even border of insulated ceiling all the way round the opening
- Which way the roof faces, so a south-facing lantern can be specified to cut summer heat gain
- Head height under the lantern, and how a pendant light or extractor will hang near it
03Frames
Aluminium or uPVC: choosing the frame
Both frame materials make good lanterns. Thermally broken aluminium gives slimmer bars and a crisper look; uPVC costs less and is naturally slow to conduct heat.
The frame is the skeleton. It holds the glass, carries the weight of the roof panels and any snow, and has to keep the outside cold from creeping through to the inside face. Two materials dominate the market, and the choice between them is about looks, budget and how the frame handles heat.
Aluminium is strong for its weight, which means the glazing bars can be slim and the glass can do more of the work. Bare aluminium conducts heat very well, which is exactly what you do not want in a roof. So a good aluminium lantern is thermally broken: the outside and inside parts of each bar are joined by a strip of low-conductivity polyamide, so there is no continuous metal path for heat to escape along. Without that break, the inside face of the bars runs cold and you get condensation tracking down them on winter mornings. With it, the bars stay close to room temperature.
uPVC lanterns are made from plastic profiles stiffened with aluminium or steel inside the rafters. The plastic itself is a poor conductor of heat, which is a point in its favour, but the profiles are chunkier, so the bars look heavier and take up more of the glazed area. Ridge caps and cladding are often bulkier too. On a modest extension where cost matters, uPVC is a sound choice. On a large, statement lantern, aluminium usually gives the cleaner finish.
Aluminium frames are powder coated, so you can choose almost any colour, and many systems offer a different colour inside and out: anthracite grey on the roof, white inside to match the ceiling. For a fuller side-by-side, read aluminium vs uPVC roof lanterns.
Thermally broken aluminium
Slim bars and more glass for the same opening. A polyamide break stops the frame bleeding heat. Powder coated in a wide choice of colours, often dual colour. Higher initial cost, and the slimmest profile on the market for a large span.
uPVC with reinforced rafters
Lower cost and a material that is slow to conduct heat in its own right. Deeper, wider bars, so slightly less glass. White, grey or foiled finishes. A practical, warm option for a smaller lantern on a tighter budget.
04Glazing
The glass, and the numbers that decide how warm it feels
Glazing is where most of a lantern's heat is lost or kept. A low U-value, a warm-edge spacer and the right coatings are what make the room comfortable under it.
The figure that matters is the U-value, measured in W/m²K. It tells you how many watts of heat pass through one square metre of the glazing for every degree of difference between inside and outside. Lower is warmer. Building Regulations Part L sets a limiting U-value for a new or replacement rooflight in an existing home, and every roof lantern we fit beats it comfortably.
Double glazing in a lantern is two panes with a sealed gap between them, filled with argon gas rather than air because argon carries less heat. One of the panes carries a low-emissivity coating, an invisible metal oxide layer that reflects warmth back into the room. Triple glazing brings in one more pane and one more gap. It is heavier and costs more, but it brings the centre-pane U-value down a long way, which you feel as a warmer surface overhead on a cold night.
The edge of the glass matters too
Where the panes meet, a spacer bar holds them apart. Older units used aluminium spacers, which conduct heat out through the edge of the glass and leave a cold strip around every panel. That cold strip is where condensation forms first. We fit warm-edge spacers as standard, made from a low-conductivity composite, so the edge of each pane stays warmer and drier. Our guide to warm-edge spacers and thermal breaks shows why this small part changes how the whole lantern behaves.
Solar control and self-cleaning glass
A south or west-facing lantern can turn a kitchen into a greenhouse in August. Solar control glass carries a coating that reflects a share of the sun's heat while still letting daylight through, and it can be tinted neutral, blue or grey. The outer pane can also carry a self-cleaning coating that breaks down dirt in daylight and lets rain wash it off. The inner pane should be laminated, which holds together if broken. Approved Document K does not demand that for a lantern, but it is good practice over a room where people sit, and we specify it. For the full picture on heat ratings, see rooflight U-values explained.
- 2.2W/m²K, the Part L limit for a new or replacement rooflight in an existing home in England
- 1.1W/m²K, a typical centre-pane value for argon-filled double glazing with a low-E coating
- 0.6W/m²K, a typical centre-pane value for argon-filled triple glazing with two low-E coatings

05Upstand
The upstand: where warm lanterns are won or lost
The kerb the lantern sits on is the part nobody sees and the part that decides whether the glass is ringed by a chilly, damp-prone edge. Insulating it properly, and joining it to the roof insulation, is the job.
The upstand is a raised frame, usually built from treated timber, that lifts the lantern clear of the flat roof. It does three things. It gives the roof membrane something to turn up against, so rainwater on the roof can never reach the joint with the lantern. It gives the lantern a level, square base to sit on. And it sets the height of the glass above the roof. Most lantern makers and roofing guidance call for the top of the upstand to sit at least 150mm above the finished roof surface.
Here is the thermal problem. A timber kerb standing up out of a warm roof is a cold bridge waiting to happen. Heat flows out through the timber sides, the inside face of the kerb gets cold, and you end up with a chilly band around the lantern where moisture in the kitchen air settles as condensation. On older extensions it is common to find bare timber kerbs with no insulation at all, and that band is often what owners notice before anything else.
How we keep the kerb warm
We line the upstand with rigid insulation board and make sure that insulation meets the roof insulation without a gap. On a warm deck roof, where the insulation sits above the deck, the board runs up the outside face of the kerb under the membrane. On a cold deck roof, where the insulation sits between the joists, we insulate the inside face and close the gap at the base. Either way, the line of insulation runs continuously from the roof, up the kerb and into the lantern frame. A vapour control layer on the warm side stops damp air from the room getting into the build-up. For a quick overview, read what a roof lantern upstand is.
A warm upstand, layer by layer
- Kerb
- Treated timber, sized to the lantern base and fixed to the trimmed opening
- Height
- At least 150mm above the finished roof surface
- Insulation
- Rigid PIR board on the kerb, lapped onto the roof insulation with no gap
- Vapour control
- A continuous layer on the room side, sealed at the joints
- Roof finish
- The roof membrane dressed up the kerb and under the lantern flashing
06Lining
The inside finish around the opening
Inside, the opening is boarded, insulated and finished so the lantern looks built in and the reveal is as warm as the ceiling around it.
From the room, you look up through a short shaft between the ceiling and the base of the lantern. That shaft is the reveal, and its depth depends on the depth of the joists and the height of the upstand. A tidy reveal is boarded with plasterboard, taped and skimmed or jointed, then painted to match the ceiling, so the eye runs straight from the ceiling into the glass.
The reveal is also a heat path. If its boards are fixed straight to bare timber, the sides of the shaft run cold, and on a damp winter evening you can see the line where condensation gathers. We back the reveal with insulated plasterboard or a layer of board behind standard plasterboard, so the surfaces inside the opening stay as warm as the rest of the ceiling. The joint where the lantern's internal frame meets the reveal is sealed to stop warm, wet air from the kitchen slipping behind the lining.
Lights, blinds and the finishing details
The reveal is the obvious place for LED strip lighting, which lights the lantern from within after dark and stops it turning into a black hole at night. If you want lighting there, we plan the cable route before the lining goes on, not after. Lantern blinds are available for most systems and can help keep a little more heat in on winter nights and cut the glare on summer afternoons. Where you want an electrician or a blind fitter involved, we leave the opening ready for them.
Some people ask for a deeper reveal, painted a strong colour, to make the lantern a feature. Others want it as shallow as possible so the glass seems to float. Both work. The point is to choose it on purpose rather than end up with whatever depth the joists happen to give.
A cold reveal undoes a warm lantern, so the lining around the opening gets the same thought as the glass above it.
07Rules
Planning permission and Building Regulations for roof lanterns
The rules depend on whether the lantern goes on a brand-new extension or into an existing flat roof, and whether the house is listed. We sort out which applies before anything is ordered.
On a new extension, the lantern is part of the extension. If the extension is being built under permitted development rights, or with a planning permission, the lantern goes in under the same rules as the rest of the roof. It should be shown on the drawings from day one, and the extension's Building Regulations application covers it.
Adding a lantern to an existing flat roof is different. Permitted development for rooflights (Class C) only covers rooflights that stand no more than 150mm proud of the roof surface. A lantern sits higher than that, so whether it needs planning permission depends on the house and the council's view. Flats and maisonettes do not have these permitted development rights at all. An Article 4 direction can remove them. Listed buildings need listed building consent in every case. Our answer to whether roof lanterns need planning permission goes through it, and the skylight planning permission guide covers the wider rules.
Building Regulations
Cutting a new opening in an existing roof is a structural alteration, so it needs Building Regulations approval. Replacing a whole lantern, frame and glass together, counts as fitting a controlled fitting under Part L, which makes it notifiable too. Replacing just one sealed glass unit in a sound frame is not. Where the job is notifiable we make the Building Control submission ourselves, so what reaches you is the completion certificate rather than the paperwork. On an extension, Part L also limits the total area of windows, roof windows and glazed doors to a quarter of the extension's floor area plus the area of any windows lost, unless a calculation shows the extension performs as well another way. The Approved Document L page on GOV.UK has the full text, and our page on whether rooflights need Building Regulations puts it in plain terms.
| Situation | Planning | Building Regulations |
|---|---|---|
| Lantern on a new extension | Follows the extension's own permission | Covered by the extension's application |
| New lantern in an existing flat roof | Check with the council, as it stands above 150mm | Needed for the structural opening |
| Whole lantern replaced | Usually none if like for like | Notifiable under Part L |
| Sealed unit replaced only | None | Not notifiable |
| Listed building | Listed building consent always | Applies as normal |
08Fitting day
What happens on fitting day
One team does the whole job, from protecting the floor to clearing the last offcut. Most of the work happens on the roof, and the room below is sheeted and kept clean.
Before we arrive, the survey has settled the size, the frame, the glass and the build-up, and the lantern has been made to measure. On the day, the first job is inside: dust sheets down, floors covered with hard protection where we will be walking, worktops and furniture wrapped or moved. The opening is then marked out from above and checked against the room below so it lands exactly where it was drawn.
On an existing roof, the roof covering is cut back, the deck is opened, and the joists are trimmed and doubled where needed. The upstand is built, insulated and squared, and the roof membrane is dressed up it. The lantern frame is assembled on the kerb, the ridge and hips go on, and then the glass units are lifted into place and clipped or capped. Weather decides a lot here: we watch the forecast and keep a temporary cover ready, so the room is never left open to a shower.
Inside, the reveal is boarded and insulated, the joints are sealed and the plastering is either done by us or left ready for the plasterer, as agreed at quote stage. Then we clean the glass, take away the old roof materials and offcuts, lift the protection and walk you through how the lantern works and how to look after it.
A straightforward lantern on a new extension is often in within a day once the roof is ready for it. Cutting into an existing roof takes longer, because of the structural work and the making good. We tell you the expected timescale in the written quote, and our answer on fitting a lantern to an existing flat roof explains what the survey looks for.
- Protect floors, worktops and furniture under the work area
- Mark the opening and check it against the room below
- Open the roof, trim the joists and fit any new timbers
- Build, insulate and seal the upstand, then dress the membrane up it
- Assemble the frame, set the glass and fix the ridge and cappings
- Board, insulate and seal the reveal inside
- Clear away, clean the glass and hand over with care advice
09Replacement
Replacing an old roof lantern
Swapping a tired, cold lantern for a modern one is one of the quickest ways to make an older extension warmer. The opening is usually there already, so the work centres on the kerb and the glass.
Plenty of lanterns put up in the nineties and early two-thousands are now showing their age. Polycarbonate roofs go cloudy and brittle. Old double glazed units mist between the panes when their seals give out. Early aluminium frames without a thermal break run with condensation every cold morning. Even a lantern that still keeps the rain out may be costing you heat and comfort compared with what is available now.
When we replace a lantern, we take the old one off and look hard at what it was sitting on. A bare timber kerb gets insulated, or rebuilt if the timber is soft. The membrane around it is renewed and dressed up the new upstand. If the old opening was poorly proportioned for the room, a replacement is a chance to change it, although altering the size means extra structural work and a fresh look at the planning position.
If only one or two glass units have misted and the frame is still sound and thermally broken, you may not need a whole new lantern. Replacing a sealed unit is a smaller job and is not notifiable. Our page on misted and failed rooflights covers that option. If the frame is the cold part, though, new glass in an old frame only goes so far.
Ask yourself whether the room under the lantern feels colder than the rest of the house in winter. If it does, the glass and the kerb are the likely reasons, and a replacement built to today's Part L will feel noticeably different. Our roof lantern buying guide lists what to compare when you collect quotes.
10Cost
What drives the cost of a roof lantern
The price of a lantern job comes down to size, frame, glass and the state of the roof it goes into. Here is how each one moves the figure, in general terms.
Every lantern we quote is made to measure, so there is no single price. What we can do is show you which choices push the cost up and which keep it sensible, so you can decide where the money does most good. For broad market guidance, our costs page sets out typical ranges and what they depend on.
Size is the obvious one: more glass and longer bars cost more, and above a certain span the glass units get heavy enough to need extra hands or lifting gear. Frame material comes next, with thermally broken aluminium generally sitting above uPVC. Triple glazing, solar control coatings and self-cleaning glass each add to the glass cost, though they also change how the room feels to live in, so they are rarely the place to save.
The roof underneath
The biggest unknown is often the roof itself. A lantern going onto a new extension, where the opening and upstand were planned in, is the simplest case. Cutting into an existing roof adds structural work, new timbers, the upstand and making good of the roof finish. When the current roof covering is close to worn out, it can make sense to renew it during the same visit rather than disturb it twice. Access matters too: a lantern on a ground-floor extension with clear access from the garden is easier than one reached through the house.
Our free survey and written quote spell out exactly what is included, so you can compare like for like. The warm specification page lists the thermal details we price in as standard.
| Factor | Adds to the cost | Keeps it lower |
|---|---|---|
| Size and shape | Large spans, long rectangles, bespoke angles | Standard sizes, square or near-square |
| Frame | Thermally broken aluminium, dual colour | uPVC in a standard finish |
| Glass | Triple glazing, solar control, self-cleaning | Low-E double glazing with warm edge |
| Roof work | New opening, new timbers, roof renewal | New extension with the opening ready |
| Extras | Integrated lighting, blinds, opening vents | A fixed lantern with a plain reveal |
11Aftercare
Looking after your roof lantern
A modern lantern asks for very little: clean glass, clear gutters around it, and a bit of air moving in the room below. Do those and it stays bright and warm for years.
Self-cleaning glass does a lot of the outside work on its own, but it needs daylight and rain to do it, and leaves or bird mess will still sit in the corners. A gentle wash with warm water and a soft brush on an extendable pole, from a safe position, is enough. Avoid abrasive pads, pressure washers and harsh chemicals, which can damage coatings and seals. Never walk on the glass. Our answer on how to clean a roof lantern has the step by step.
On the roof, keep the area around the upstand free of moss, leaves and standing water, and check that any outlets or gutters on the flat roof drain freely. Inside, wipe the frame and glazing bars with a damp cloth and mild soap now and then.
Warmth and condensation
A well specified lantern on a properly insulated kerb should stay comfortable through the winter. Kitchens produce a lot of moisture, though, and even the warmest glass can show a little condensation if the air in the room is saturated. Run the extractor when you cook, open a trickle vent or an opening section if your lantern has one, and keep the heating ticking over in very cold spells. If you are worried about how a lantern will feel in winter, our answer to are roof lanterns cold in winter explains what makes the difference.
Your installation comes with our 10-year workmanship guarantee, and the details are on our guarantee page. Keep the Building Control completion certificate with your house documents, as a buyer's solicitor will ask for it.
- Wash the outer glass gently from a safe position, never from on top of the lantern
- Clear leaves and moss from around the upstand and the roof outlets each autumn
- Wipe the inside frame and the reveal with a damp cloth and mild soap
- Run the extractor while cooking and keep some ventilation going in winter
- Keep the completion certificate and guarantee with your house papers
What worries people before a lantern goes in
How long does a roof lantern installation take?
On a new extension where the opening and kerb are ready, the lantern itself often goes in within a day. Cutting a new opening in an existing flat roof takes longer because of the structural work, the upstand and making good inside and out. Your written quote gives the expected timescale for your job.
Is a roof lantern the same as a skylight?
A roof lantern is one type of skylight. The word skylight, or rooflight, covers any glazed opening in a roof. A lantern is the raised, multi-sided version that sits on a flat roof, while a flat rooflight is a single, nearly level panel and a roof window sits in a pitched roof.
Will a roof lantern make my extension colder?
Any glass loses more heat than an insulated roof, but a lantern with low-E argon-filled glazing, warm-edge spacers, a thermally broken frame and an insulated upstand keeps that loss small. The cold rooms people remember usually had old glazing and a bare timber kerb, which is what we design out.
Can you fit a lantern to a roof that another builder put on?
Yes. We survey the roof first to check the joists, the build-up and the condition of the covering, then design the opening and upstand to suit. If the survey finds the covering is nearly worn out, we say so before you commit.
Do you need to come inside the house on fitting day?
Yes, for part of it. We protect the floors and furniture under the opening, and the reveal is boarded and insulated from inside. Most of the work happens on the roof, and we clear up as we go so the room is usable again at the end.